Green Filters for B&W Photography
Why a Green Filter?
If a red filter is about drama, and a yellow filter is about correction, a green filter is about foliage.
The Green 58 (also known as the Wratten 58) is the most popular green filter for black and white film. It makes trees, grass, and plants come alive. Without any filter, panchromatic B&W film tends to render green foliage as a dark, muddy grey. Different shades of green all merge together into the same tone, and all that texture and detail disappears.
A green filter fixes this. It passes green light through to the film while blocking red and blue, which means green objects receive more exposure and record as brighter tones. The result is foliage that looks the way it actually looks to your eye: bright, textured, and full of variation.
If you need a refresher on where green light sits in the visible spectrum, have a play with the slider below:
Green light occupies the middle of the visible spectrum, roughly 495 to 570nm. A green filter passes this band while absorbing both the shorter wavelengths (blue, violet) and the longer wavelengths (red, orange). This makes it the most selective of the common B&W contrast filters.
Our simulator includes both the Green 58 (the standard green filter, also called the Wratten 58) and the Green 99 (a darker, narrower-band green). This guide focuses on the Green 58 as the go-to choice, with the 99 as an alternative for stronger effects.
Our Reference Photo
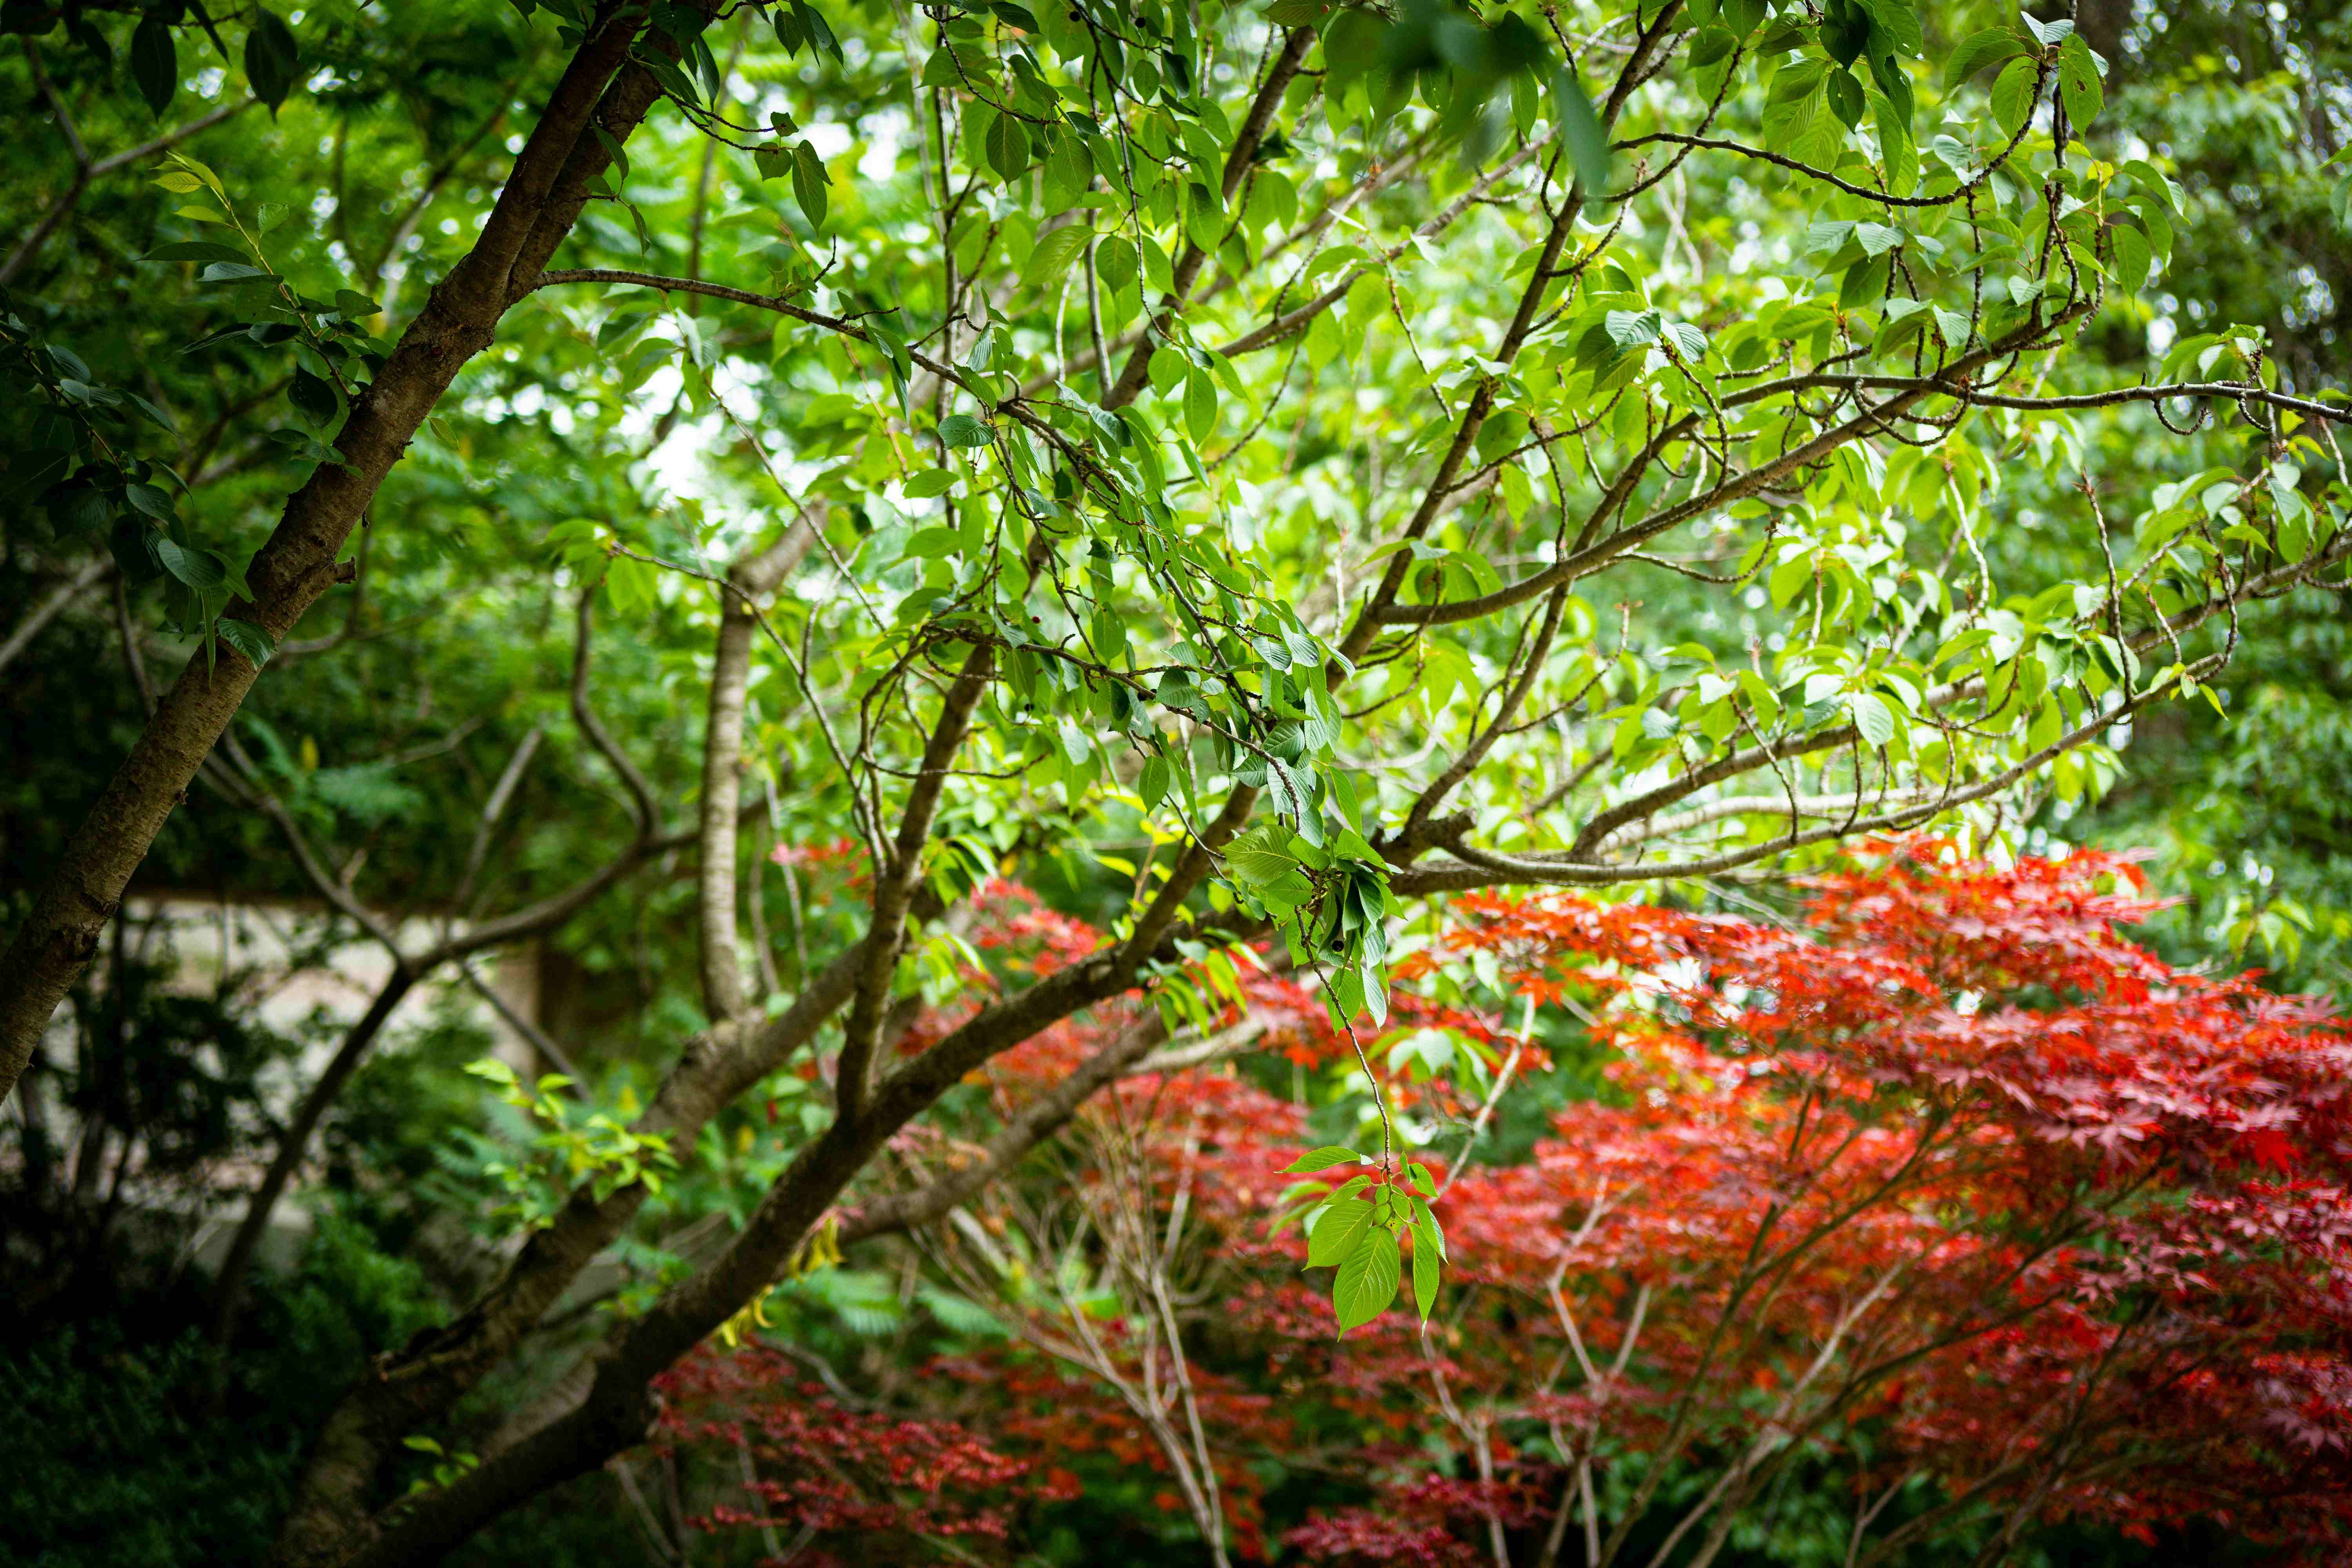
For this guide we picked a scene that shows exactly why green filters exist. This garden shot has bright green leaves alongside a deep red Japanese maple. In colour, the contrast between them is obvious. In unfiltered black and white, those two trees would collapse into nearly the same grey tone.
Photo by Airci K on Unsplash
This is the perfect test case for a green filter. The green leaves and red maple are complementary colours, so a green filter will push them in opposite directions: the greens will brighten while the reds darken. Two trees that would look identical in plain B&W will suddenly stand apart.
How Green Filters Change Contrast on Film
A green filter does the opposite of what a red filter does. Where a red filter lightens warm tones and darkens cool ones, a green filter lightens greens and darkens reds. Here’s the breakdown:
- Green objects (foliage, grass, moss) receive more light and appear brighter
- Red objects (brick, lips, autumn leaves) receive less light and appear darker
- Blue skies darken slightly, though less dramatically than with a yellow or red filter
- Skin tones shift, with warm and ruddy tones going darker while olive tones lighten
This makes the green filter a specialist tool. It’s not the everyday corrective filter that the Yellow 8 is. It’s the filter you reach for when the vegetation in your scene is the star of the image.
Here’s our reference photo with a Green 58 filter applied. Watch what happens to the two trees:
Click or tap anywhere on the image to move the split and compare different areas of the scene.
The green foliage has brightened, while the red Japanese maple has darkened. Two trees that were almost the same tone in straight B&W now have clear tonal separation. That is the green filter doing exactly what it’s designed to do.
Foliage: The Main Event
This is the reason photographers buy a green filter. Without one, black and white film renders most green vegetation as a dark, uniform grey. Dark pine needles, bright meadow grass, and olive-tinted shrubs all collapse into the same tone. You lose the depth and variation that your eyes saw when you took the shot.
A green filter brings that variation back. Light green leaves brighten, darker evergreens remain mid-toned, and the difference between them becomes visible. For botanical photography, garden scenes, or any landscape where the vegetation is the subject rather than the backdrop, this separation is invaluable.
The effect is sometimes compared to a mild infrared look. Infrared photography famously makes foliage glow white. A green filter produces a much gentler version of the same idea: foliage brightens, but it stays within a natural tonal range rather than going to extremes.
Green Filters and Portraits
This is where things get interesting. A green filter does the opposite of what a red filter does to skin.
A red filter smooths skin. It lightens red and warm tones, which softens blemishes, hides redness, and produces a clean, flattering look.
A green filter reveals skin. It darkens red and warm tones, which means freckles deepen, blemishes become more visible, and the natural texture of the skin shows through. Lips darken. Ruddy complexions become more pronounced.
Some portrait photographers use this deliberately. For character-driven portraits, especially of weathered or textured faces, a green filter adds a raw, honest quality that you don’t get from the smooth flattery of a red filter. It works well for dramatic, editorial-style black and white portraiture where you want the face to tell a story.
It’s not the right choice for every portrait, however. If your subject wants smooth, even skin, reach for a red or yellow filter instead.
Beyond Foliage and Portraits
Green filters have a few other uses worth knowing about:
Botanical and Garden Photography
This is the green filter’s home territory. If you’re photographing flowers against green leaves, a green filter brightens the leaves while darkening red and pink blooms. This reverses the usual hierarchy you’d get with a red or orange filter and can produce striking compositions where the foliage frames bold, dark floral shapes.
Forest and Woodland Scenes
Dense woodland can look flat and lifeless in unfiltered B&W because the canopy, undergrowth, and forest floor all render as similar dark tones. A green filter lifts the foliage tones and adds separation, giving the image a sense of depth and layers.
Overcast Days
Green filters lose less of their effectiveness on overcast days compared to red filters. Since the filter’s primary effect is on foliage rather than sky, it still adds value when there’s no blue sky to darken. The foliage brightening works regardless of the sky conditions.
Choosing Your Green Filter: 58 vs 99
We have two green filters in the simulator:
Green 58 (Tricolor) is the standard photographic green filter, also known as the Wratten 58. It passes a wide band of green light centred around 515nm, producing clear foliage brightening and strong red darkening. It’s the most commonly available green filter and the one we recommend starting with.
Green 99 is a darker, narrower-band green. Its transmission is centred around 545nm and cuts off more sharply, which produces a more aggressive effect. Greens lighten more, and reds darken more. It’s the choice when you want maximum tonal separation.
Here’s how their spectral transmission curves compare:
Based on spectral data and a generalised sensor model. Results approximate real-world behaviour.
For most B&W photography, the Green 58 is the better starting point. It’s widely available from brands like Hoya, B+W, and Tiffen under the “green” or “X1” name. The Green 99 is worth trying if you want an even more dramatic separation.
Green vs Yellow-Green vs Yellow: Where Does It Fit?
The contrast filter family forms a spectrum. At one end, the Yellow 8 provides gentle, corrective tone shaping. In the middle, the yellow-green (Wratten 11) balances sky darkening with foliage brightening. At the far end, the Green 58 goes all-in on foliage.
Here’s how a Yellow 8, Green 58, and Red 25 compare:
Based on spectral data and a generalised sensor model. Results approximate real-world behaviour.
Yellow (8) trims the blue end of the spectrum, leaving most colours relatively unchanged. Green (58) passes only the green band, blocking both reds and blues. Red (25) blocks everything below 600nm. They’re three fundamentally different approaches to B&W contrast control.
For a broader view, our yellow filters guide covers the everyday correction end, and our red filters guide covers the dramatic end.
Exposure Compensation
Green filters block a significant amount of light. A Green 58 has a filter factor of approximately 4x, which means 2 stops of extra exposure.
In practical terms: if your unfiltered reading is 1/250 at f/8, with a Green 58 you’d shoot at 1/60 at f/8, or open up to f/4 while keeping 1/250.
If your camera meters through the lens (TTL), it handles this automatically. But if you use a handheld meter, you need to add those 2 stops yourself. Use the calculator below for exact values:
Based on spectral data and a generalised sensor model. Results approximate real-world behaviour.
The Green 99 In Action
For comparison, here’s what the narrower-band Green 99 does on the same photo:
The effect is more aggressive than the Green 58. The green tree brightens further and the red maple darkens more, producing stronger tonal separation. If the 58 doesn’t feel dramatic enough, the 99 takes it up a notch.
Tips for Getting Started
Best subjects: Forest and woodland scenes, botanical photography, garden landscapes, character-driven portraits, any scene where green vegetation is the primary subject.
Use with intention: Unlike a Yellow 8 which works as an always-on correction filter, the green filter is a deliberate creative choice. Put it on when the greens matter, take it off when they don’t.
Watch your reds: If your scene has important red or warm elements (a red barn, warm-toned face, autumn leaves), a green filter will darken them significantly. This can be a feature or a problem depending on what you want.
Pair with overcast light: Green filters work well on grey days since the foliage brightening doesn’t depend on blue sky.
Try before you buy: Upload your own photos to our filter simulator and see how each green filter would affect your work. Compare the Green 58 and Green 99 on the same image to find which suits your style.
What’s Next?
Green filters occupy a unique position in the B&W contrast filter family. They’re the opposite of red filters, the more dramatic cousin of yellow-green filters, and the go-to choice for anyone who photographs the natural world in black and white.
Check out our other filter guides for the full picture: yellow filters for everyday correction, orange filters for the sweet spot, red filters for maximum drama, and spectral transmission curves for the science behind it all. For an overview of all contrast filter families, see our complete guide to colour filters for B&W photography.
Frequently Asked Questions
What does a green filter do in black and white photography?
A green filter passes green light and blocks red and blue. In black and white, this lightens foliage, grass, and trees while darkening anything red or warm-toned. It is the natural complement to a red filter and is especially useful in scenes with lots of vegetation.
How many stops does a green filter need?
A Green 58 filter has a filter factor of about 4x, which means 2 stops of extra exposure. Green filters are heavier in terms of light loss compared to yellow or orange, so TTL metering or careful manual compensation is important.
When should I use a green filter for black and white?
Use a green filter when your scene has lots of foliage and you want the greens to render as bright, separated tones instead of dark mud. It is also useful for portraits where you want to emphasise skin texture and character, and for botanical or garden photography.
What is the difference between a green filter and a yellow-green filter?
A pure green filter like the Green 58 (Wratten 58) has a strong effect, heavily lightening greens and heavily darkening reds. A yellow-green filter like the Wratten 11 is more balanced, combining gentle sky darkening with gentle foliage brightening. The yellow-green is more versatile but less dramatic.
Can I use a green filter for portraits?
Yes, but the effect is the opposite of what a red filter does. A green filter darkens red and warm tones in the skin, which can emphasise freckles, blemishes, and skin texture. Some portrait photographers use this deliberately for a rugged, characterful look.
What is the difference between a green filter and a red filter?
They are opposites. A red filter lightens reds and darkens greens. A green filter lightens greens and darkens reds. Red filters produce dramatic skies and smooth skin. Green filters produce bright foliage and textured skin. Choosing between them depends entirely on what you want to emphasise in the scene.