Orange Filters for B&W Photography
Why an Orange Filter?
If a yellow filter is a gentle correction and a red filter is full drama, an orange filter is the sweet spot between the two.
The Yellow-Orange 16 (also known as the Wratten 16) is one of the most popular contrast filters for black and white film photography. It darkens blue skies more aggressively than a yellow filter, cuts through atmospheric haze, smooths skin tones in portraits, and produces punchy, natural-looking contrast that works in almost any outdoor scene. Many landscape photographers consider it the best all-round B&W contrast filter because it delivers visible results without the heavy-handed intensity of a red.
If you need a refresher on where orange light sits in the visible spectrum, have a play with the slider below:
Orange light sits between yellow and red in the spectrum, roughly 585 to 620nm. An orange filter passes this region and everything above it (red) while blocking shorter wavelengths (blue, violet, and most green). The further into orange you go, the more blue and green the filter blocks.
Our simulator includes three orange filters: the Yellow-Orange 16 (Wratten 16), the Orange 21 (Wratten 21), and the Deep Orange 22 (Wratten 22). This guide focuses on the Yellow-Orange 16 as the go-to choice, with the 21 and 22 as stronger alternatives.
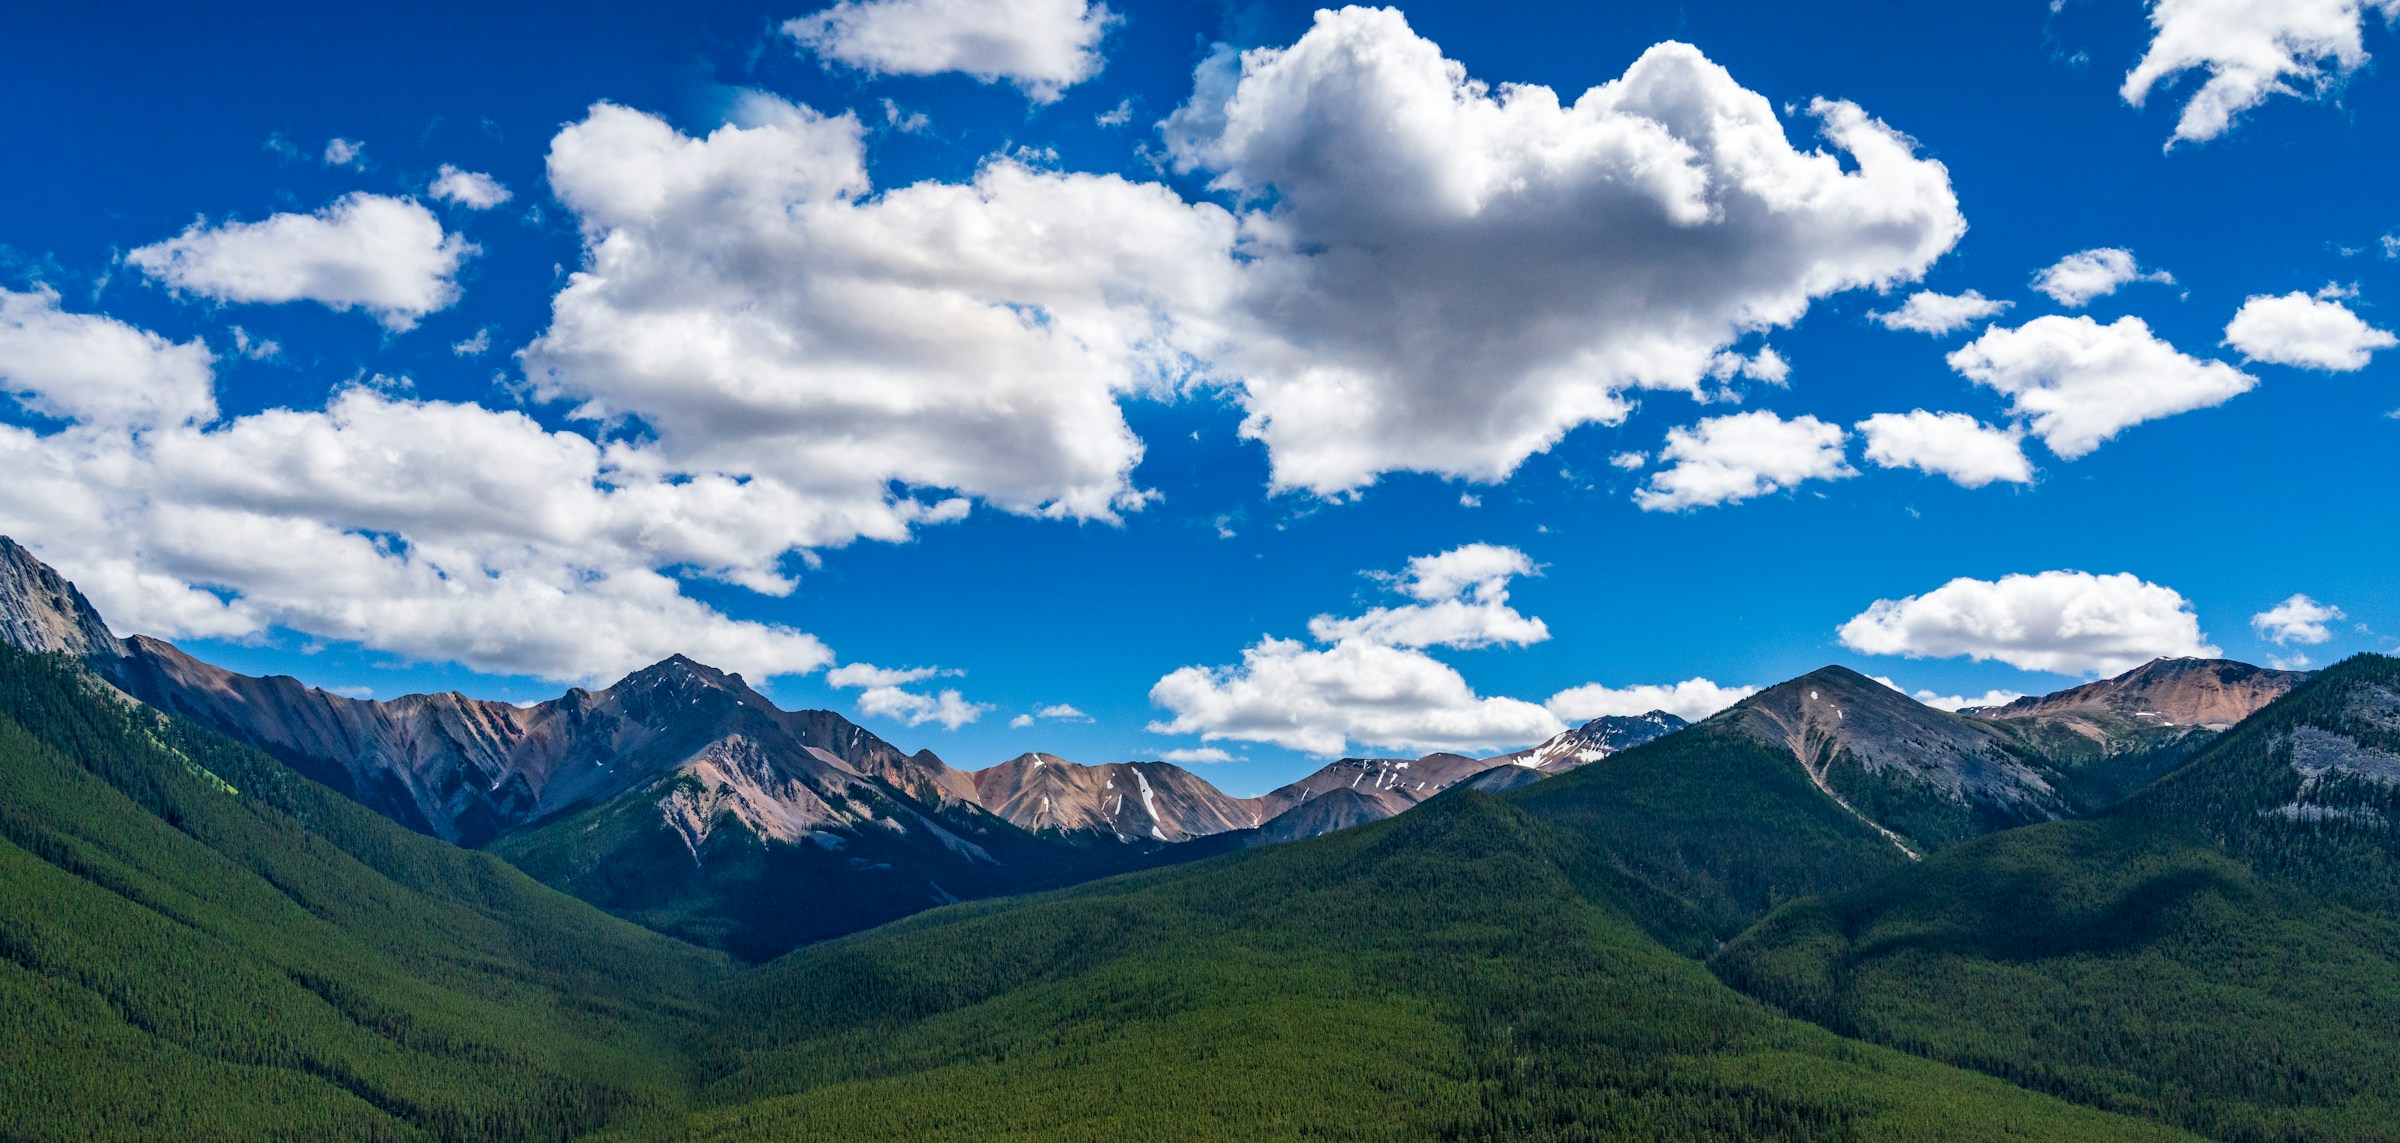
Our Reference Photo
We’re using the same mountain panorama from our yellow filters guide and red filters guide, which makes it easy to compare all three. Take a good look at the big blue sky filled with cumulus clouds, the dense green forests on the slopes, and the distant peaks fading into atmospheric haze.
Photo by Kai Gradert on Unsplash
This scene has everything an orange filter excels at: a wide blue sky to darken, clouds to bring out, haze on the horizon to cut through, and green foliage to add contrast against. If you’ve already read the yellow and red posts, you’ll see exactly where the orange filter sits between them.
How Orange Filters Change Contrast on Film
On black and white film, every colour becomes a shade of grey. An orange filter shifts those shades by blocking blue and green light before it reaches the emulsion:
- Blue objects (sky, water, shadows) receive much less light and appear noticeably darker
- Green objects (grass, foliage, trees) darken moderately, more than with a yellow filter
- Red and warm objects (brick, autumn leaves, warm stone) lighten slightly
- Skin tones lighten gently, smoothing blemishes and producing a softer look
The effect is stronger than a Yellow 8 but less extreme than a Red 25. Where a yellow filter makes a correction that’s hard to spot, and a red filter makes a statement you can’t miss, an orange filter lands in the middle: unmistakably there, but still natural.
Here’s our reference landscape with a Yellow-Orange 16 filter applied. The left shows the filtered result, the right shows unfiltered B&W:
Click or tap anywhere on the image to move the split and compare different areas of the scene.
The sky has gone from a washed-out pale grey to a rich, darker tone, and the clouds now stand out with real punch. The forested slopes have darkened too, adding contrast and depth. The distant peaks are more defined as the haze has been partially cleared. Compare this to the Yellow 8 result on the same photo and the difference is striking.
Stronger Skies Without the Drama
This is the reason most photographers reach for an orange filter over a yellow. A Yellow 8 corrects the sky back to what your eyes expected. An orange filter goes a step further and actually enhances it. Clouds gain real presence, the sky becomes a rich backdrop instead of a neutral one, and the overall image has a sense of depth and atmosphere.
But unlike a red filter, the result still looks natural. A Red 25 can turn a calm afternoon sky into something that looks like a storm is rolling in. That drama is spectacular when you want it, but it’s not right for every shot. An orange filter gives you punchy, attention-grabbing skies that still feel believable.
This makes it a favourite for landscape photography where the sky is a big part of the composition but you don’t want to overpower the rest of the scene.
Beyond Skies
Orange filters have a few other uses worth knowing about:
Architecture
An orange filter darkens the sky behind buildings, making facades stand out sharply. The effect is stronger than with a yellow filter, giving you cleaner separation between building and sky. It works particularly well with warm-toned stone, brick, or concrete, which lighten slightly through an orange filter while the sky behind them goes darker.
Haze and Atmosphere
This is one of the orange filter’s strongest suits. Atmospheric haze scatters shorter blue wavelengths more than longer ones. An orange filter blocks most of that scattered blue, effectively clearing the view. Distant mountains, cityscapes, and horizon lines all gain definition and clarity.
An orange filter is significantly better at haze penetration than a yellow filter and nearly as effective as a red. If you’re shooting landscapes with distant features and want them to be crisp without the extreme contrast of a Red 25, an orange filter is the tool for the job.
Portraits
Orange filters produce flattering skin tones in black and white. They lighten warm tones in the skin, which gently smooths blemishes, freckles, and redness. The effect is subtler than a red filter, which can sometimes lighten skin so much it looks unnatural. An orange filter strikes a balance: enough smoothing to be beneficial, not so much that it looks artificial.
For outdoor portrait shoots where you also want a darker sky behind your subject, an orange filter handles both at once.
Foliage
Green foliage darkens moderately through an orange filter. The effect is less extreme than with a red filter, which turns greens very dark. With an orange, green leaves and grass go to a deeper mid-grey, adding some tonal weight to vegetation without making it go completely dark. This can add welcome contrast in scenes where bright foliage would otherwise compete with the sky for attention.
Choosing Your Orange Filter: 16 vs 21 vs 22
We have three orange filters in the simulator:
Yellow-Orange 16 (Wratten 16) is the most popular orange-range filter for B&W photography. It sits right at the boundary between deep yellow and orange, providing stronger sky darkening and haze cutting than a Deep Yellow 15 while keeping the effect natural. It’s the one we recommend starting with. Manufacturers typically rate it at about 2 stops of exposure compensation.
Orange 21 (Wratten 21) is a step up. It blocks more blue and green light, producing more aggressive sky darkening and stronger haze penetration. The contrast increase is more pronounced, and the overall feel starts to approach what you’d get from a red filter. It’s a good choice if the 16 isn’t quite punchy enough but you don’t want to go full red.
Deep Orange 22 (Wratten 22) is the strongest orange filter and sits right at the boundary with red. It produces dramatic sky darkening and very strong contrast. If you want the most impact you can get without crossing into red filter territory, this is it.
Here’s how their spectral transmission curves compare:
Based on spectral data and a generalised sensor model. Results approximate real-world behaviour.
For most B&W photography, the Yellow-Orange 16 is the best starting point. It’s widely available from brands like Hoya, B+W, and Tiffen, and it delivers a clear, visible effect without excessive exposure cost. The Orange 21 and Deep Orange 22 are worth trying if you want progressively stronger results.
Orange vs Yellow vs Red: Where Does It Fit?
The contrast filter family follows a clear progression. Yellow provides the gentlest correction, orange gives you moderate enhancement, and red delivers full drama. Each step up blocks more blue and green light, producing progressively stronger contrast.
Here’s how a Yellow 8, Yellow-Orange 16, and Red 25 compare:
Based on spectral data and a generalised sensor model. Results approximate real-world behaviour.
Yellow (8) trims the blue end and corrects. Orange (16) blocks deeper into the blue and green, producing stronger skies and better haze penetration. Red (25) blocks everything below 600nm for maximum drama. Orange sits right in the middle: significantly more impact than yellow, significantly less extreme than red.
For a detailed look at the gentler end, see our yellow filters guide. For the dramatic end, see our red filters guide.
Exposure Compensation
Orange filters block more light than yellow but less than red, keeping them practical for handheld shooting.
A Yellow-Orange 16 typically needs about 2 stops of extra exposure. In practical terms: if your unfiltered reading is 1/250 at f/8, with a Yellow-Orange 16 you’d shoot at 1/60 at f/8, or open up to f/4 while keeping 1/250.
If your camera meters through the lens (TTL), it handles this automatically. But if you use a handheld meter, you need to add those 2 stops yourself. Use the calculator below to explore values based on spectral data:
Based on spectral data and a generalised sensor model. Results approximate real-world behaviour.
The Orange 21 In Action
For comparison, here’s what the stronger Orange 21 does on the same photo:
The effect is noticeably stronger than the Yellow-Orange 16. The sky is darker, the cloud contrast is more aggressive, and the forested slopes have dropped further in tone. The haze on the distant peaks has cleared even more. If the 16 doesn’t feel punchy enough for your style, the 21 takes it up a notch while still looking less extreme than a Red 25.
Tips for Getting Started
Best subjects: Landscapes with blue sky and clouds, architecture against clear skies, hazy distant views, portraits in natural light, and any scene where you want noticeable but natural-looking contrast enhancement.
The Goldilocks filter: If you’re unsure whether to buy a yellow or a red, start with an orange. It gives you enough of an effect to see real results in your prints without the commitment of a red filter’s extreme contrast.
Works well for portraits: An orange filter smooths skin and darkens the sky behind your subject at the same time. For outdoor B&W portraits, that’s a practical two-for-one.
Watch your greens: Foliage darkens moderately through an orange filter. This is usually a benefit in landscapes (it adds contrast), but in scenes where the vegetation is the star of the shot, a green filter would serve you better.
Try before you buy: Upload your own photos to our filter simulator and see how each orange filter would affect your work. Compare the Yellow-Orange 16 and Orange 21 on the same image to find which suits your style.
What’s Next?
Orange filters sit at the heart of the B&W contrast filter family. They deliver more impact than yellow, more restraint than red, and a reliability that makes them one of the most versatile filters you can own for film photography.
If you want to understand the science behind how these filters work at a deeper level, check out our guide to understanding spectral transmission curves. For the gentler end of the spectrum, see our yellow filters guide. For maximum drama, see our red filters guide. And for the opposite approach entirely, our green filters guide covers the foliage specialist. For an overview of all contrast filter families, see our complete guide to colour filters for B&W photography.
Frequently Asked Questions
What does an orange filter do in black and white photography?
An orange filter passes orange, red, and yellow light while blocking blue and most green. In black and white, this darkens blue skies noticeably, enhances cloud contrast, cuts through atmospheric haze, and gently smooths skin tones. The effect sits between a subtle yellow filter and a dramatic red filter.
How many stops does an orange filter need?
A Yellow-Orange 16 typically needs about 2 stops of extra exposure. An Orange 21 needs about 2 stops, and a Deep Orange 22 needs about 2.5 stops. Through-the-lens metering handles the compensation automatically.
Is an orange filter better than a yellow or red filter for B&W?
It depends on the effect you want. An orange filter is the middle ground: stronger sky darkening and haze penetration than yellow, but without the extreme drama of red. Many photographers consider it the best all-round contrast filter for landscape work because it produces punchy but natural-looking results.
What does an orange filter do to skin tones in B&W portraits?
An orange filter gently lightens warm tones in the skin, which can smooth out blemishes and freckles. The effect is subtler than a red filter, making it more versatile for portraits where you want some smoothing without an unnatural look.
When should I use an orange filter instead of a red filter?
Use orange when you want strong sky darkening and haze penetration but still want the result to look natural. A red filter pushes skies almost to black, which can look dramatic but also heavy-handed. Orange gives you punchy contrast that most viewers would still read as a believable sky.
Can orange filters cut through haze?
Yes. Atmospheric haze scatters shorter blue wavelengths, and an orange filter blocks most of that scattered light. The result is clearer distant views with more definition in mountains, buildings, and horizon lines. Orange filters are more effective at haze penetration than yellow filters and nearly as good as red.