Red Filters for B&W Photography
Why a Red Filter?
Using a red filter is like adding drama to every frame. Blue skies go dark, clouds leap forward, and your black and white photos suddenly have a punch they didn’t have before. It’s one of the oldest tricks in film photography, and it’s still one of the most effective.
A red filter works by passing red wavelengths of light and blocking blue and green. When you’re shooting colour film, this just turns everything red. But on black and white film, where there’s no colour in the final image, the filter changes something more interesting: contrast.
If you’re new to the visible spectrum or need a quick refresher on what “red light” actually means, play with the slider below:
Red light lives at the long-wavelength end of the spectrum, roughly 620 to 700nm. A red filter lets this region pass freely while blocking most of the shorter wavelengths (blues and greens).
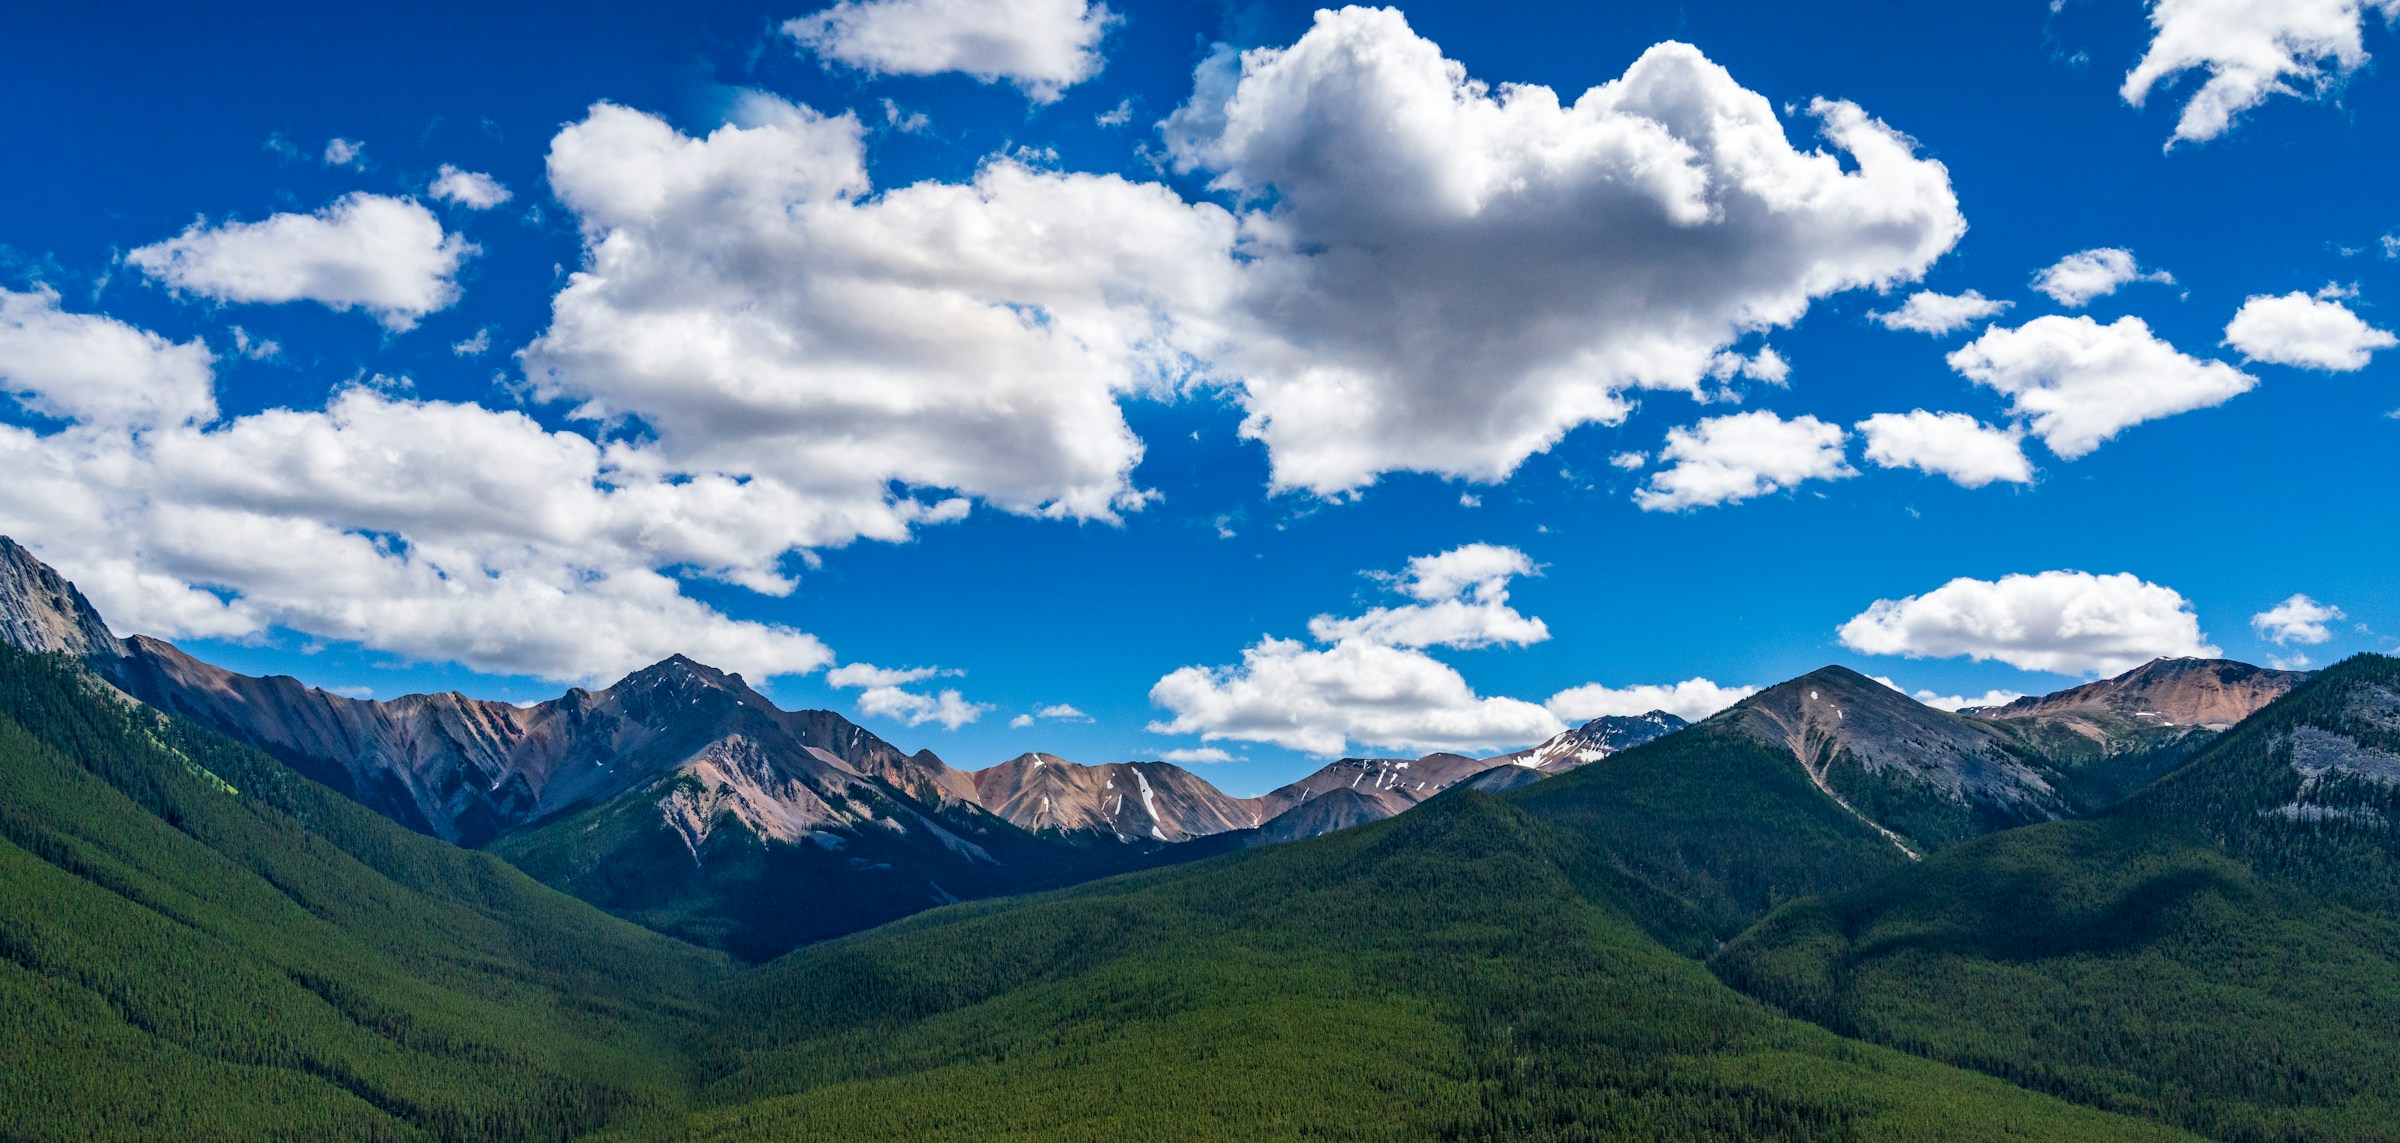
Our Reference Photo
To show you exactly what a red filter does, we’ll use this mountain panorama throughout the post. It’s the same landscape from our yellow filters guide, which makes it easy to compare the two. Take a good look at the colours: the wide blue sky packed with white cumulus clouds, the green forested slopes, and the distant peaks fading into atmospheric haze.
Photo by Kai Gradert on Unsplash
This is a perfect candidate for a red filter. There’s a vast blue sky, bold white clouds, and plenty of green foliage on the slopes. All of those colours will shift dramatically once we add a red filter.
How Red Filters Change Contrast on Film
On black and white film, every colour in the scene is recorded as a shade of grey. The film’s emulsion doesn’t know whether a tone came from a blue sky or a red barn. It only knows how much light hit it.
This is where a red filter becomes powerful. By blocking blue and green light before it reaches the emulsion:
- Red objects (brick, autumn leaves, lips) receive more light and appear lighter
- Blue objects (sky, water, denim) receive less light and appear much darker
- Green objects (grass, foliage, trees) also darken considerably
- Skin tones lighten, which can smooth blemishes and produce a softer look
The filter doesn’t add contrast everywhere. It shifts specific tones relative to each other. A grey wall stays roughly the same. But a red door next to a blue sky? The difference between them becomes enormous.
Here’s our reference landscape with a Red 25 filter applied. The left shows the filtered result, the right shows unfiltered B&W:
Click or tap anywhere on the image to move the split and compare different areas of the scene.
Look at how the sky has gone from a washed-out grey to near-black, while the clouds blaze bright white. The forested slopes have darkened too, and the distant peaks now cut through the haze with sharp definition. The contrast between sky and cloud is enormous.
Dramatic Skies: The Classic Red Filter Look
This is the reason most film photographers buy a red filter. A blue sky that would print as a mid-grey without any filter becomes very dark when shot through a Red 25. White clouds that were barely visible on the unfiltered negative now stand out with striking contrast.
The result is that “epic” look: big towering clouds against a near-black sky. Even on a perfectly calm, sunny afternoon, a red filter can make the scene feel like a thunderstorm is rolling in.
Ansel Adams famously used a deep red filter for his iconic “Monolith, the Face of Half Dome” in Yosemite. If you’ve ever wondered how he got those pitch-dark skies, this is a big part of the answer. Here’s what the Deep Red 29 does to the same scene:
The 29 pushes the effect further than the 25. The sky goes even darker, the forests become near-black, and the overall feel starts to border on an infrared look. The haze on the distant mountains has almost entirely cleared.
Beyond Skies
Red filters have a few other uses worth knowing about:
Architecture
A red filter darkens the sky behind a building, making light-coloured stone or concrete facades stand out. This is especially effective with white or cream-coloured buildings against blue sky. The result is a clean, graphic look that works well for both modern and classical architecture.
Haze and Atmosphere
Red filters cut through atmospheric haze better than any other contrast filter. If you’re shooting distant mountains or cityscapes and the horizon looks washed out, a Red 25 will bring back definition and separation. This happens because haze scatters shorter (blue) wavelengths more than longer (red) ones. By blocking the blue scatter, the filter effectively clears the view.
Portraits
This one comes with a caveat. A red filter lightens red tones in the skin, which can smooth out blemishes and create a softer look. Some portrait photographers on film love this effect. However, the result depends heavily on skin tone. Lighter skin tones tend to lighten significantly, sometimes to the point of looking pale. Darker skin tones may see less dramatic changes. It’s worth testing with your specific film stock before committing to a portrait session with a red filter.
Foliage and Nature
Green foliage darkens noticeably through a red filter. This can help separate different elements in a nature scene. Red flowers against green leaves? The flowers will glow bright while the leaves go dark. It creates a tonal separation that simply doesn’t exist without the filter.
Choosing Your Red Filter: 24 vs 25 vs 26 vs 29
Not all red filters are created equal. There are four Wratten numbers in the red filter family:
Red 24 is the gentler option. It blocks blue and most green light but lets some longer green wavelengths through. It’s a good starting point if you want a noticeable effect without going all-in.
Red 25 is the classic. This is the filter most film photographers mean when they say “red filter.” It provides strong, dramatic contrast and is the standard recommendation for B&W landscape work. If you only buy one red filter, make it a 25.
Red 26 sits between the 25 and 29. It cuts deeper into the green end of the spectrum than the 25, giving you a stronger effect without going to the extreme of the 29. It’s a good choice if you find the 25 isn’t quite dramatic enough but the 29 is too heavy-handed.
Deep Red 29 is the maximum. It blocks almost all blue and green light, producing extreme contrast that borders on an infrared look. Skies go completely black, and the tonal shifts are very aggressive. This is a specialty filter for when you want the most dramatic possible result.
The chart below shows how their spectral transmission curves compare. You can see how each successive filter cuts deeper into the shorter wavelengths:
Based on spectral data and a generalised sensor model. Results approximate real-world behaviour.
Our simulator includes the full red family (24, 25, 26, and 29) if you want to explore the differences between them all. Upload your own photos to see how each one would affect your work.
Exposure Compensation
Red filters block a lot of light. If you’re shooting film, you need to account for this when metering.
A Red 25 has a filter factor of approximately 8x. That means you need about 3 stops of extra exposure. In practical terms: if your unfiltered reading is 1/125 at f/8, with a Red 25 you’d shoot at 1/15 at f/8, or keep 1/125 and open up to f/2.8.
If your camera meters through the lens (TTL), it compensates automatically because the meter is reading through the filter. But if you use a handheld meter or the Sunny 16 rule, you need to add those 3 stops yourself.
The Red 26 and Deep Red 29 need even more compensation. Use the calculator below to see the exact filter factors and stops for each:
Based on spectral data and a generalised sensor model. Results approximate real-world behaviour.
Tips for Getting Started
Best subjects: Landscapes with blue sky and clouds, architecture against clear skies, hazy distant views, and nature scenes with strong colour contrast (red flowers, green foliage).
Avoid: Overcast days. If there’s no blue sky to darken, the filter just reduces your exposure without adding much contrast. Also avoid scenes that are already extremely high-contrast, as the filter will push them even further and you may lose detail in the shadows.
Bracket your exposures when you first try a red filter on film. Shoot one frame at the metered exposure, one a stop over, and one a stop under. Film is much cheaper than a missed shot, and you’ll quickly learn how your specific film stock responds.
Try before you buy: Upload your own photos to our filter simulator and see how each red filter would affect your style of photography. It’s the fastest way to build an intuition for what each filter does before you commit film to it.
What’s Next?
Red filters are one of the most transformative tools you can add to your B&W film kit. They’re simple, affordable, and they produce effects that are very difficult to replicate any other way.
If you want to understand the science behind how these filters work at a deeper level, check out our guide to understanding spectral transmission curves. For the middle ground between yellow and red, see our orange filters guide. For the gentler end of the contrast spectrum, see our yellow filters guide, and for the foliage specialist, our green filters guide. For an overview of all contrast filter families, see our complete guide to colour filters for B&W photography.
Frequently Asked Questions
What does a red filter do in black and white photography?
A red filter passes red light and blocks blue and green. In B&W, this makes anything red appear lighter in tone while blue and green objects go much darker. The result is dramatically increased contrast, especially in skies.
How much exposure compensation does a red filter need?
A Red 25 filter has a filter factor of about 8x, which means you need roughly 3 stops of extra exposure. If your camera meters through the lens (TTL), it handles this automatically. Manual meter users need to compensate themselves.
What is the difference between a Red 24, Red 25, Red 26, and Deep Red 29 filter?
The Red 24 is the gentlest, blocking blue and most green. The Red 25 is the classic B&W contrast filter that most photographers use. The Red 26 cuts deeper into the green spectrum, offering a stronger effect. The Deep Red 29 blocks even more blue and green light, producing an extreme contrast effect that approaches an infrared look. Each step up also requires more exposure compensation.
Can I use a red filter for portrait photography?
Yes. A red filter can smooth skin by lightening red tones and reducing the visibility of blemishes. However, the effect varies depending on skin tone, and the overall contrast increase may be too strong for some portrait styles.
Can I use a red filter if I shoot digital black and white?
Yes. You can either use a physical red filter on your lens and convert to B&W, or simulate the effect in post by adjusting the red channel during B&W conversion. Film shooters get the real deal baked into the negative, which is part of the appeal.
When should I not use a red filter?
Red filters work best on sunny days with blue skies. On overcast days there is no blue sky to darken, so the filter simply reduces exposure without adding much contrast. Avoid using them on scenes that are already extremely high-contrast.